The release of OpenIDM 5.0 allows implementors to quickly and efficiently set up integration with three of the major social IdPs; Facebook, Google and LinkedIn. Leveraging a Social IdP for self-service registration and authentication significantly lowers the barrier to enter and gain access to valuable applications and services yet collects valuable and often required information for companies without the end user to manually having to enter the same identity data over and over again.
This article will guide you through the technical setup of setting up and utilize LinkedIn as social IdP for authentication and self-service registration. I will assume that OpenIDM is newly installed.
If you are trying to leverage any of the other supported Social IdPs you need to configure a fully qualified domain name (FQDN) for OpenIDM. LinkedIn accepts Localhost which is why we utilize LinkedIn in this article.
Below are the steps required to perform this setup. Each step will be described in detailed.
- Creating an Application in LinkedIn
- Configure->Socal ID Providers in OpenIDM
- Turn on LinkedIn. Go to dev site and get
- Client ID and Client Secret
- Insert Redirect URIs
- Enable Social Providers authN module
- Enable Social Self-Service Registration
Creating an Application in LinkedIn
A prerequisite to being able to set up Social IdP integration in OpenIDM is an existing application in LinkedIn. The LinkedIn developer site allows you to create applications using the LinkedIn API.
- Point your browser to: https://www.linkedin.com/developer/apps
- Should you not already have a company created, create one.
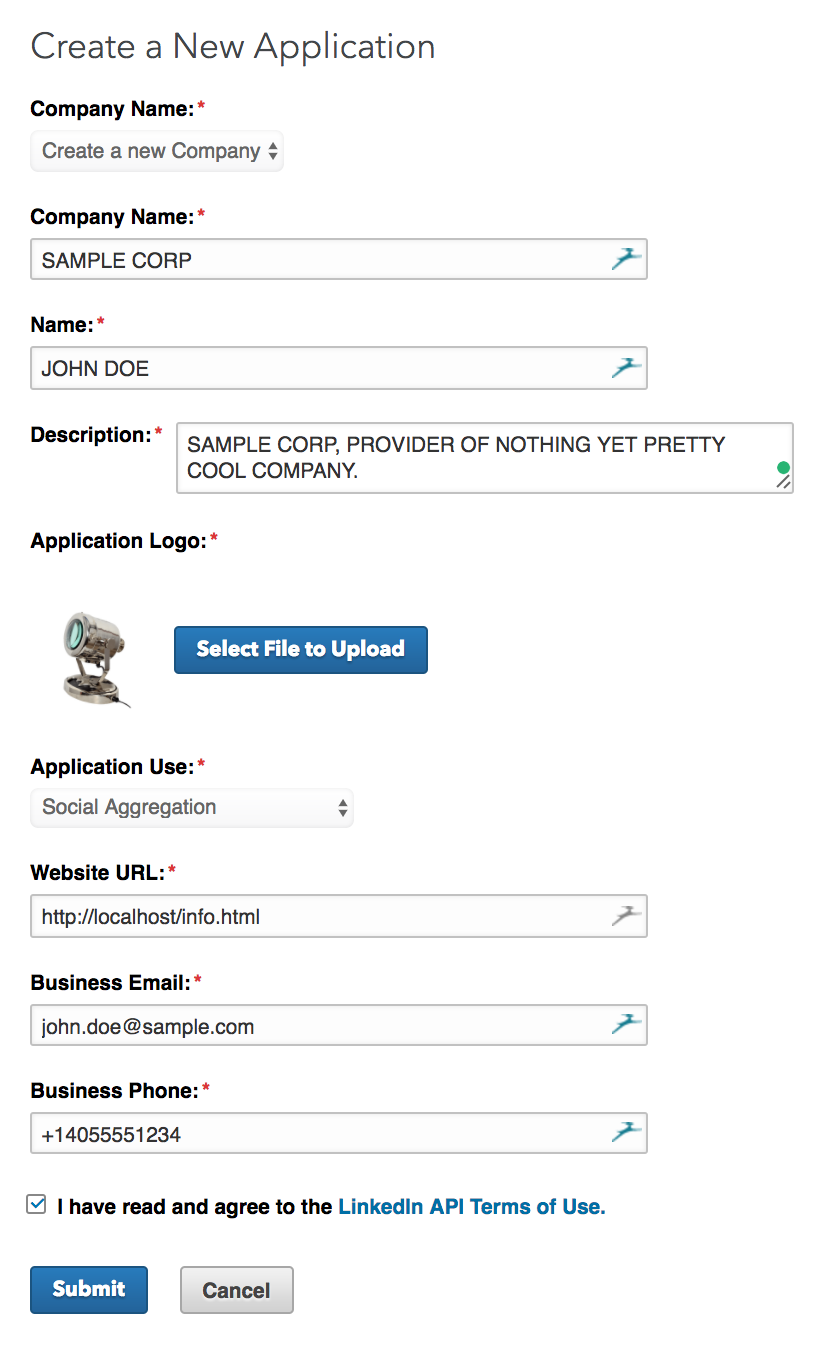
3. Next step is to create the actual Application. The application will allow you to get two important credentials. Client ID and Client Secret, required for configuring Social IdP integration in OpenIDM. It will also allow you to define Redirect URLs.
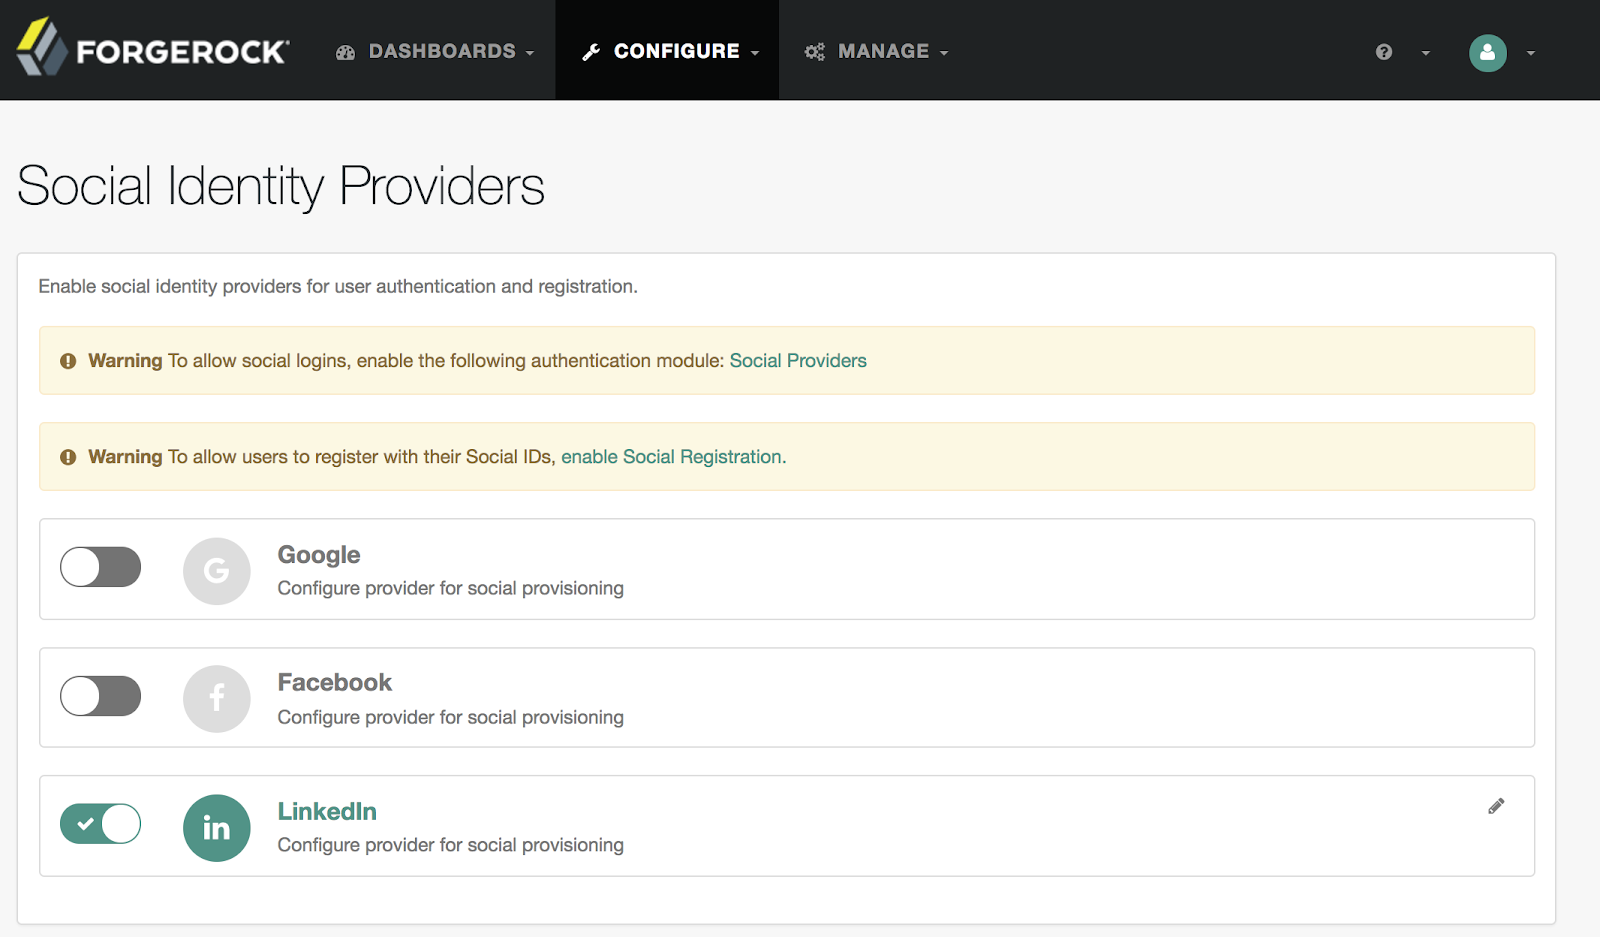
Configure->Social Identity Providers in OpenIDM
Next up will are going to configure LinkedIn as a Social Identity Provider. Point your browser to OpenIDM administrative interface and click on Configure->Social Identity Providers in the top menus.
The configuration screen that follows is where the Client ID and Client Secret should be defined.
Make sure you click “save” once the Client ID and Client Secret have been inserted from the LinkedIn Developer Site and the newly created Application in the previous step.
Configure Social Provider as an Authentication module
Since we want to leverage LinkedIn for authentication, we also need to configure Social Identity Provider as an authentication module. The two “Warnings” that pops up will take you straight to the two steps necessary to complete this exercise. Just click on “Social Providers” or via the menu option Configure->Authentication and the the Module tab.
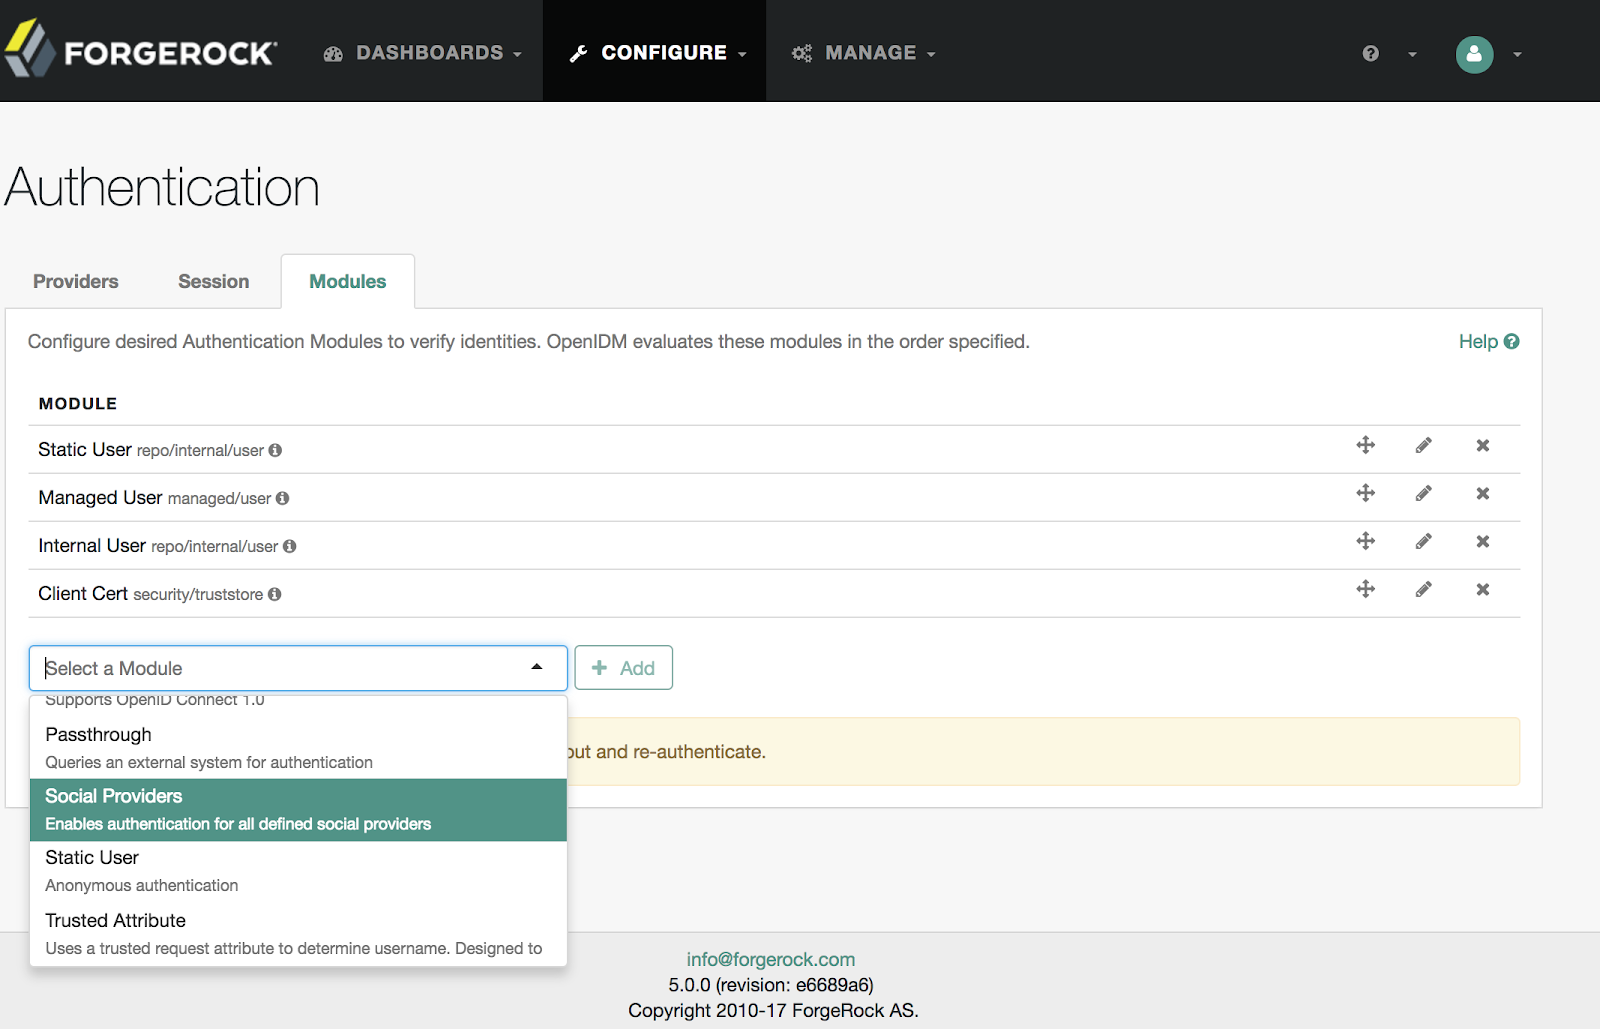
Make sure to select “+ Add”. The default configuration values can be left as is and save the settings by selecting “Submit”.
Ensure LinkedIn is leveraging during Self-Service Registration
To utilize the identity information available in users LinkedIn profiles during registration and thereby lowering the barrier to register make sure you select Configure->Self Service and turn “Social Registration” to ON.
The Social Registration Properties tab outlines how the identity data will populate the managed user object, which in turn is what we can leverage to provision downstream to integrated target resources. Should you want to amend or augment the user with additional identity data, this is the place where you can make the necessary changes and/or additions.

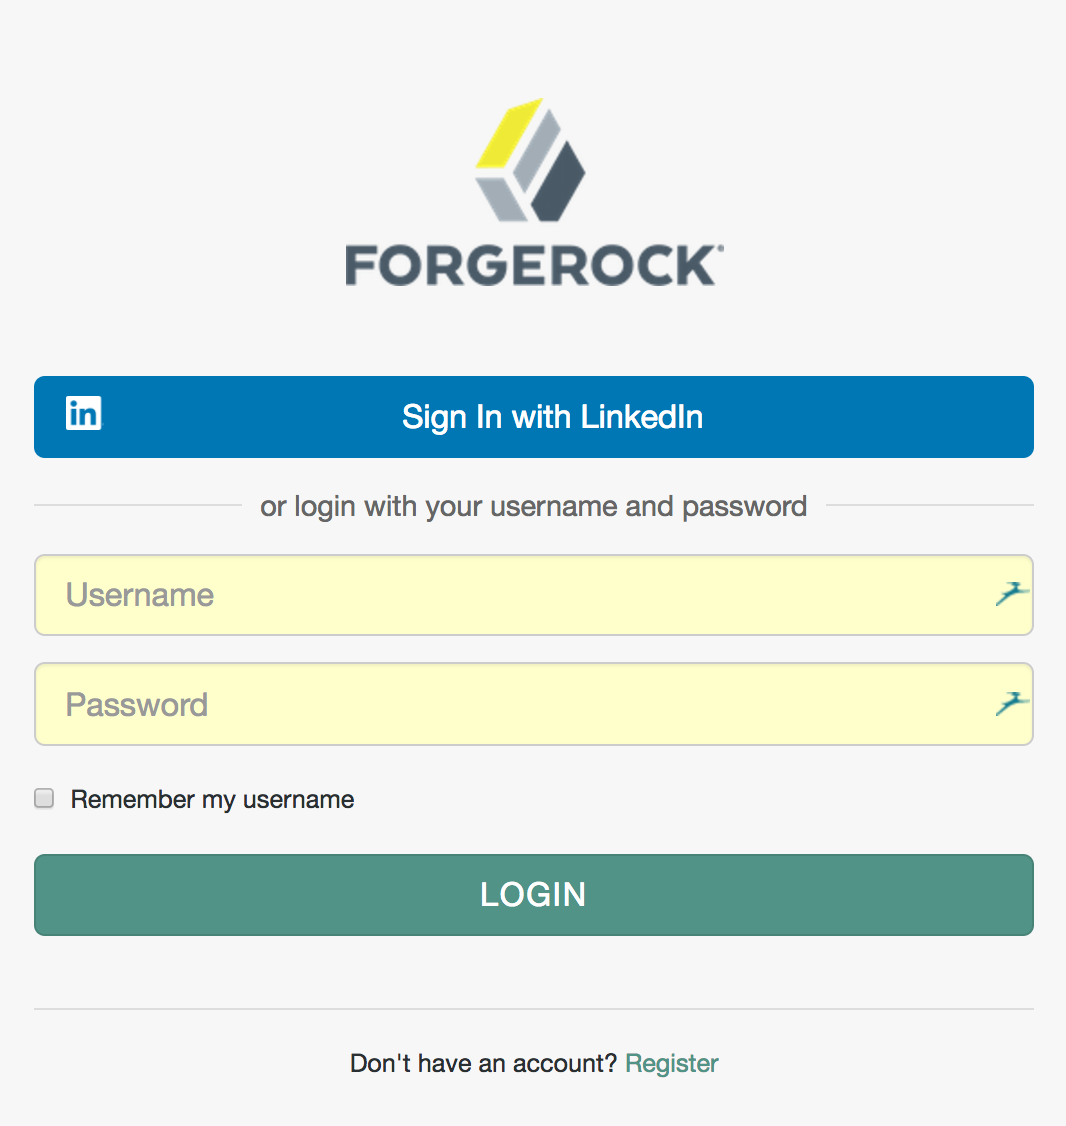
Should we log out at this point, a LinkedIn authentication button will be displayed on both the Administrative user interface as well as the self-service user interface. The Self-service interface also has a link at the bottom of the page to register for a new account.
Summary and conclusion
The introduction of Social IdP integration in OpenIDM 5.0 allows customers to quickly take advantage of Social Identity Providers for self-service registration and authentication. This lowers the barrier to enter and limits the necessity to register using multiple forms being displayed to users. The information gathered allows for downstream provisioning to marketing solutions, such as Marketo, or to other integrated target resources. Try it out and let me know how it goes!
